Quick start (graphical user interface)
This tutorial explains how you can use the MMLF’s graphical user interface. It assumes that you already installed the MMLF successfully. It might be helpful to read the Quick start (command line interface) tutorial first in order to have some understanding of what is going on “under the hood”.
The MMLF’s GUI can be started from the command line with the command
mmlf_gui
or for unix-based local installations:
./mmlf_gui
This should create a window that looks like this:

The main window consists of three tabs: the “Explorer”, the “Experimenter”, and the “Documentation”. The last tab displays the documentation you’re now reading. The other two tabs will be explained in more detail in this tutorial.
Explorer
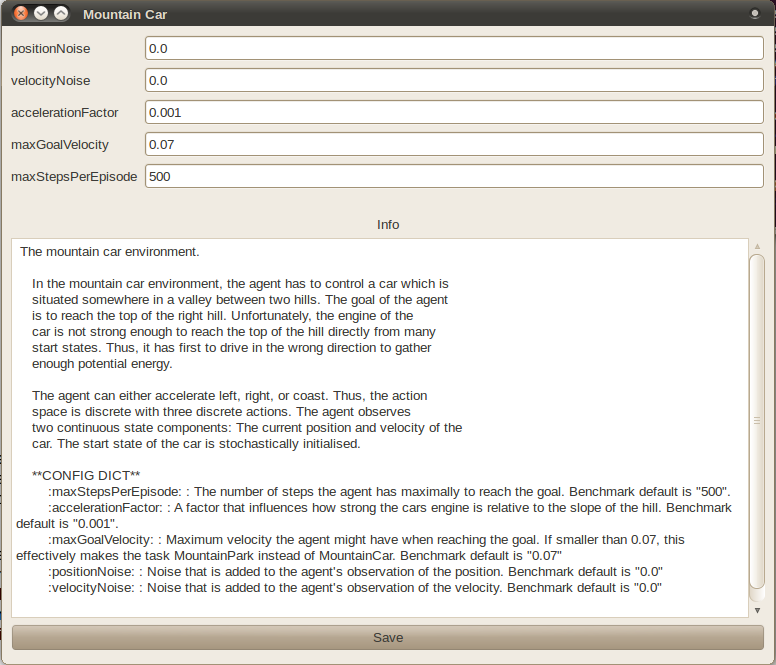
The explorer’s main purpose is to investigate the behaviour of a specific agent in a specific environment. It provides different kinds of visualizations (depending on the world) of what is going on. In the explorer tab, the environment and the agent that should be used in the world can be selected from combo boxes. The selected agents and environments can be configured by pressing the configure button. This creates a popup window like the following:

In this popup, the agent’s and environment’s parameters can be modified and stored by pressing “Save”. Furthermore, help on a specific parameter is provided as a tooltip of the respective edit field. An alternative to manually configuring agent and environment is to load a world with predefined agent and environment using the “Load Config” button. Accordingly, “Store Config” allows to store a manual configuration of a world such that it can be easily reloaded later on.
Back in the explorer tab, the selected agent and environment can be loaded by pressing “Init World”. Now, the Monitor which controls the information that are automatically stored during running a world in the MMLF can be configured by pressing “Configure Monitor”. Once this is done, we can start the configured world. One step in this world can be performed by pressing “Step”, one single episode by pressing “Episode”, and infinitely many by pressing “Start World”. This indefinite run can be stopped by pressing “Pause World” and resumed by pressing “Resume World”. By pressing “Stop World”, the execution of the particular world is irrevocably terminated and a new world could be loaded using “Init World”.
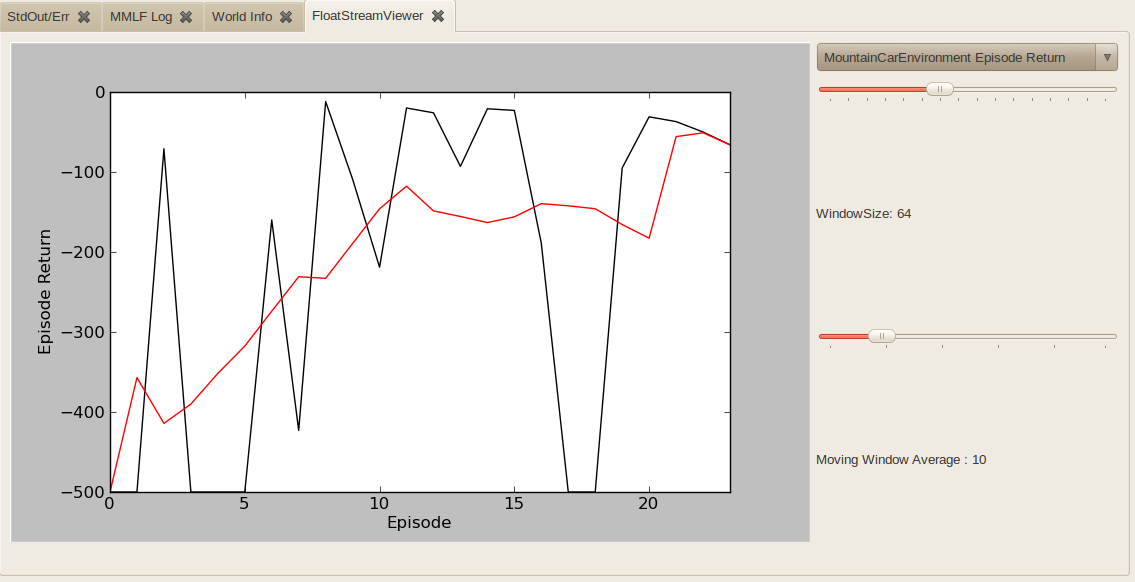
The tab “StdOut/Err” shows the output of the program to standard output and standard error. Some more detailed information about the currently running experiment can be obtained via the text output in the “MMLF Log” Tab. Additionally, the “World Info” tab shows some information about the currently selected agent and environment. Furthermore, so called viewers can be added that visualize the progress in a graphical manner. In all environments, the so called “FloatStreamViewer” is available that allows to monitor the development of a real-valued metric over time. This viewer looks like the following:

This viewer shows the change of the metric over time as well as its moving window average (in red). The metric can be selected via the combobox and the range of shown window as well as the length of the moving window average window can be specified.
For several worlds, additional viewers become available after loading a world using “Init World”. For instance, in the maze2d_environment, an additional viewer is available that shows the current policy and value function (see below):

For an overview over all availabe viewers, please take a look at Viewers.
Note
Adding viewers might slow down the MMLF (the learning of the agents) considerably since updating the viewers with a high frequency might consume most of the CPU time. However, by closing the viewers, the MMLF should run with its former speed again. Thus, one can use viewers to introspect the current state of the world and close them after that.
A good way of getting to know the MMLF is to load different world configurations shipped with the MMLF (using “Load Config”), run these worlds, and visualize whats going on with different viewers.
Experimenter
The “Experimenter” is meant to be used when one wants to compare the learning performance in different settings (for example different agents/agent parametrizations in the same environment or the same agent in slightly different environments etc.). It looks like the following:

The “Create World” button launches a window in which agent and environment of a world can be configured in the same way as in the Explorer. Once this is done, “Save” adds this world to the list of worlds in the upper left part of the Explorer tab. Alternatively, one can also load a stored world configuration using “Load World”. An arbitrary world can be modified later on by selecting it in the world list and pressing “Edit World”, can be removed from the world list by pressig “Remove world”, and can get assigned a more meaningful name by selecting it and editing the name in the text field right of the “Remove world” button. Alternatively, instead of manually adding and editing worlds, one can also load a whole experiment configuration using “Load Experiment”. Accordingly, configured experiments can be stored using “Store experiment”.
Furthermore, one can specify how many independent runs of each world are conducted (the more often the more reliable become the performance estimates) by editing the entry in text field right of “Runs” and how many episodes each run should take (text field “Episodes”). In addition, one can select whether the independent runs of the world should be conducted sequentially (one after the other) or concurrently (in a separate OS-process each). By editing the text field “Parallel running processes”, one can choose how many runs are conducted in parallel (this is fixed to 1 for sequential execution). The maximally allowed number of parallel processes is the number of (virtual) cores in the machine.
Note
A word of warning: the concurrent execution of world processes is still in an experimental state and may behave strangely under certain conditions (for instance it might not shutdown correctly and keep some zombie processes). Furthermore, Windows OSes do not support concurrent execution of worlds.
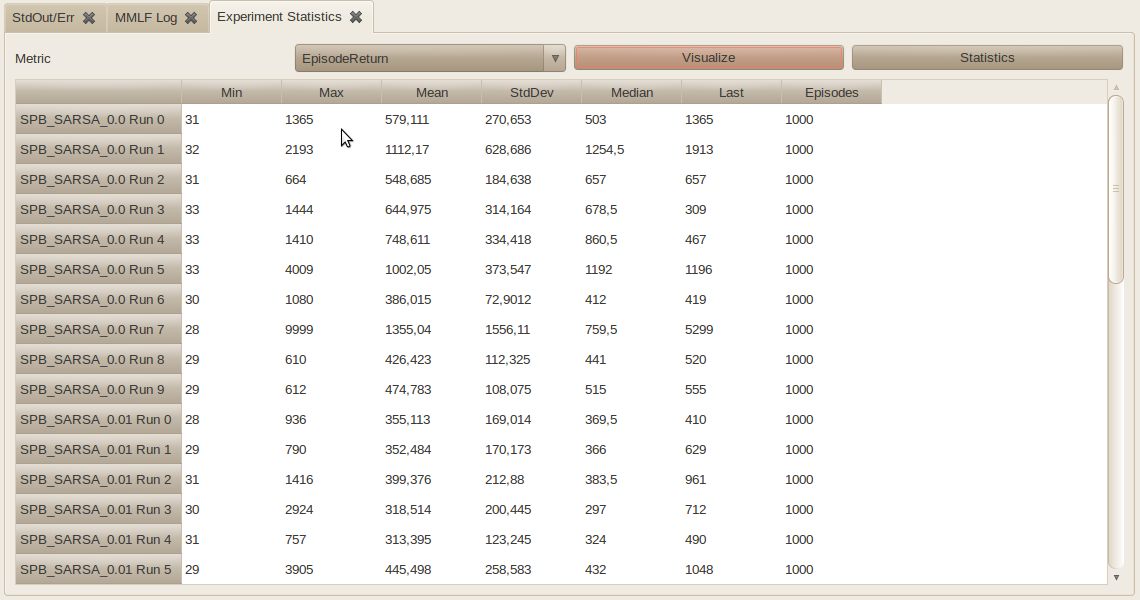
By pressing “Start Experiment”, the experiment is started and a new tab “Experiment Statistics” is added in which the progress of the experiment can be monitored in real time:

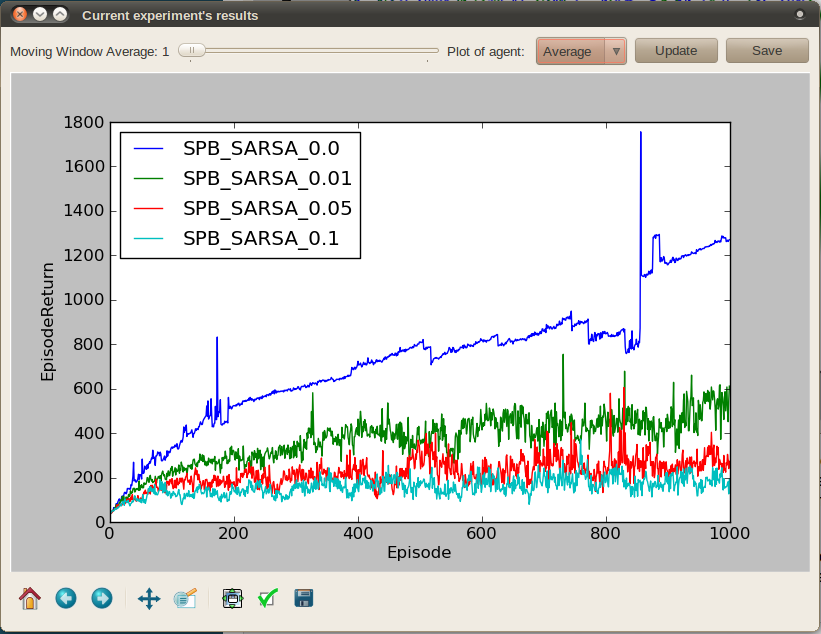
In the top line, the metric that should be displayed can be selected. The metric “Episode Return” is always available; it shows the accumulated reward per Episode. Below this, a table is shown which presents some statistics (min, max, mean, median etc.) of the chosen metric for the different runs of the worlds. The results of the experiment can be analyzed for statistical significance by pressing the “Statistics” (see Evaluating experiments). By pressing “Visualize”, these results can also be displayed in a graphical manner:

In this visualizations, one can see the development of the selected metric over time for the two agents. One can select whether one wants to see the average over all runs conducted for one agent or each of these runs separately. Furthermore, one can specify the length of the moving window average. The plot is not updated automatically, but only when one presses “Update” or when one changes the selections. One can save the generaed plot to a file by pressing “Save”.
The “Experiment Statistics” tab can also be restored for an experiment conducted earlier by loading the results of this experiment into the Experimenter. This can be done by pressing “Load Experiment Results”. This opens a file selection dialog in which the root directory of the particular experiment in the RW area must be selected.
Note
It may happen that different experiments share the same root directory (namely, when both experiments use the same environment). In this case, the Experimenter cannot distinguish these experiments and interprets them as a single experiment. In order to avoid that, please copy the results of an experiment to a unique directory manually.
See also
- Tutorial Quick start (command line interface)
- Learn how to use the MMLF with a non-grapical user interface
- Learn more about Existing agents and Existing environments
- Get an overview over the agents and environments that are shipped with the MMLF
- Tutorial Writing an agent
- Learn how to write your own agent
- Tutorial Writing an environment
- Learn how to write your own MMLF environment
- Learn more about Experiments
- Learn how to do a serious benchmarking and statistical comparison of the performance of different agents/environments
